How to draw anything realistically is a question that so many people ask artists on a daily basis. While there isn’t a one-size-fits-all or an exact recipe to follow, many artists share how they learned to draw, so you can follow the same steps and improve your drawing skills with time.
In this article, I am going to share with you my take on how you can draw anything more realistically.
This page contains affiliate links, meaning I earn a commission if you use those links. Please read my Disclosure for more details.
“The recipe” for realistic drawing
You have to master the basics, and in the past, I have shared many articles to help you get started on your art practice journey, such as a pencil drawing guide for beginners (the top-most-read article on this blog), an overall look at the 7 elements of art (I will be referring back to it in this article), the principles of art, and a beginner’s guide to successful composition, which you might as well read first.
I have so many more articles about the use of colors, how to start practicing new art mediums, and many more. Make sure you subscribe to my newsletter for new blog posts every Monday and Thursday!
How to draw anything?
Pick up your sketchbook and pencil, and let’s get started.

1. Train your eyes to notice the overall shape of things first
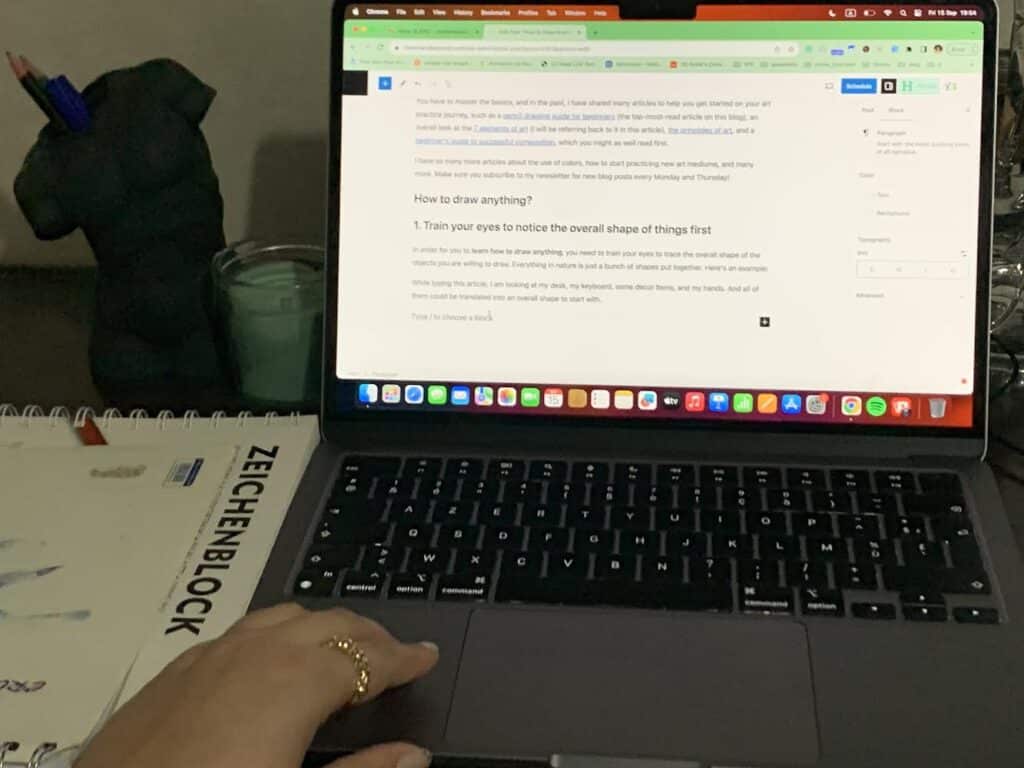
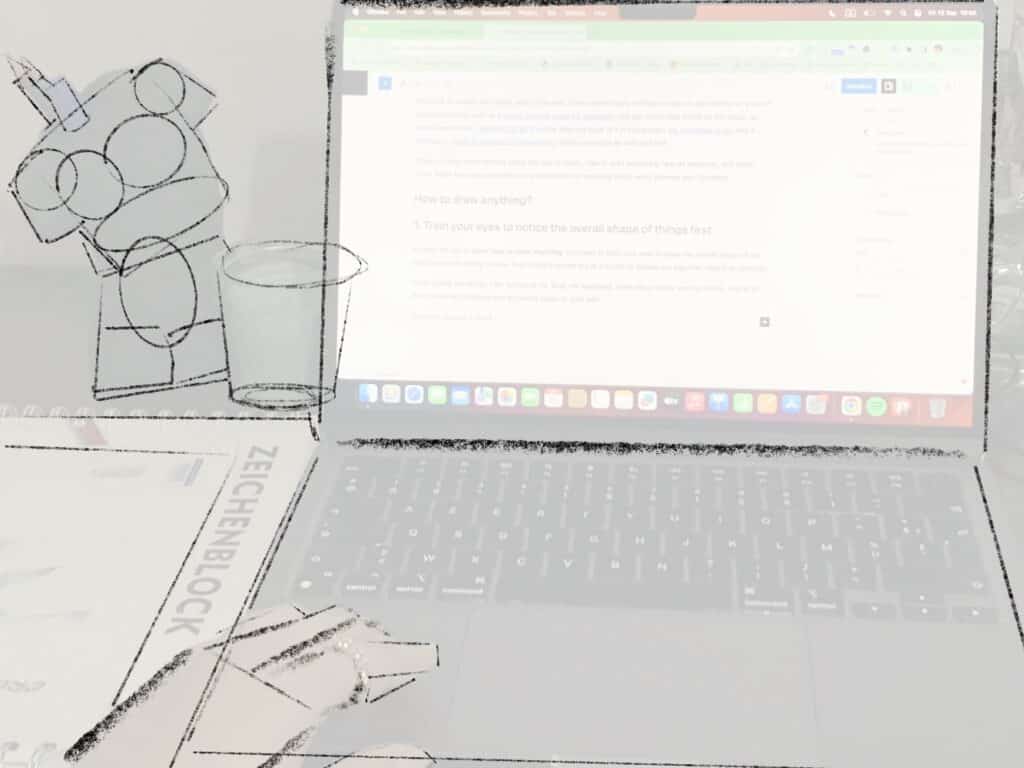
In order for you to learn how to draw anything, you need to train your eyes to trace the overall shape of the objects you are willing to draw. Everything in nature is just a bunch of shapes put together. Here’s an example:
While typing this article, I am looking at my desk, my keyboard, some decor items, and my hands. All of them could be broken down into simple shapes, which will help set a correct foundation for our drawing.
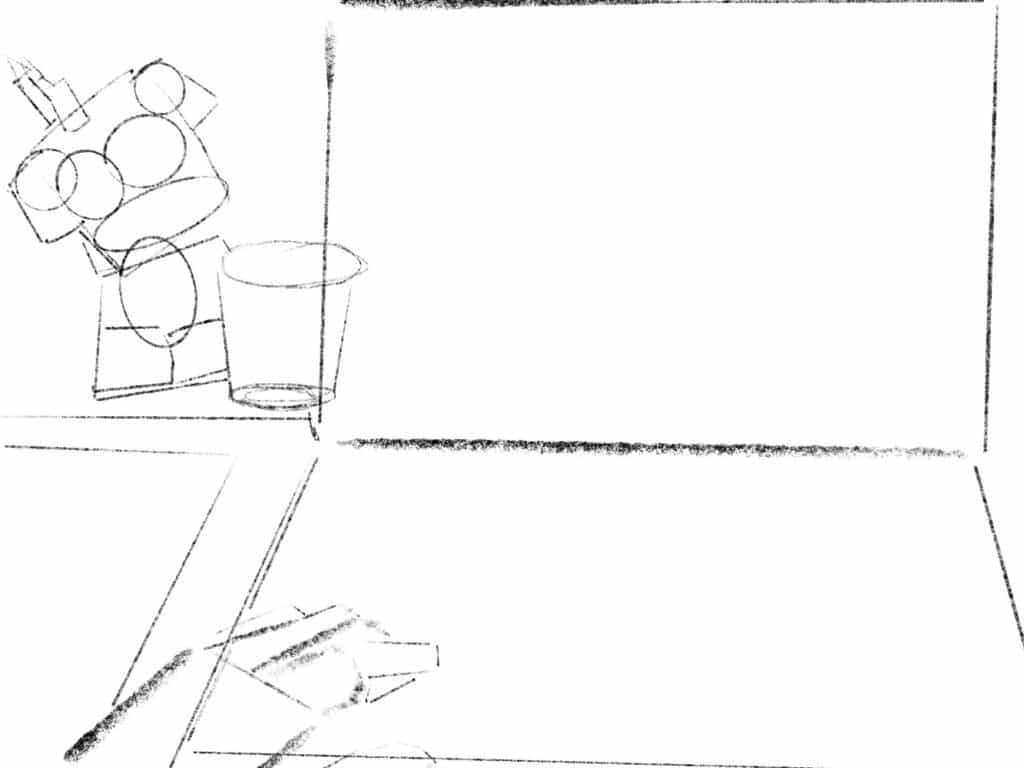
Once you have trained your eyes to extract the overall shape of an object, it will be very easy for you to draw anything you see.
I have an article all about muscle memory and how to teach your mind and hands to draw things from your imagination that you are going to love.
2. Practice drawing shapes
This will be a great warm-up exercise and a very efficient way to get used to sketching the objects you are willing to draw.
My only advice here would be to do the practice at a moderate pace. Don’t go so slow that you overthink the shapes you’re drawing, and don’t go so fast that the shapes are sloppy or whatever.
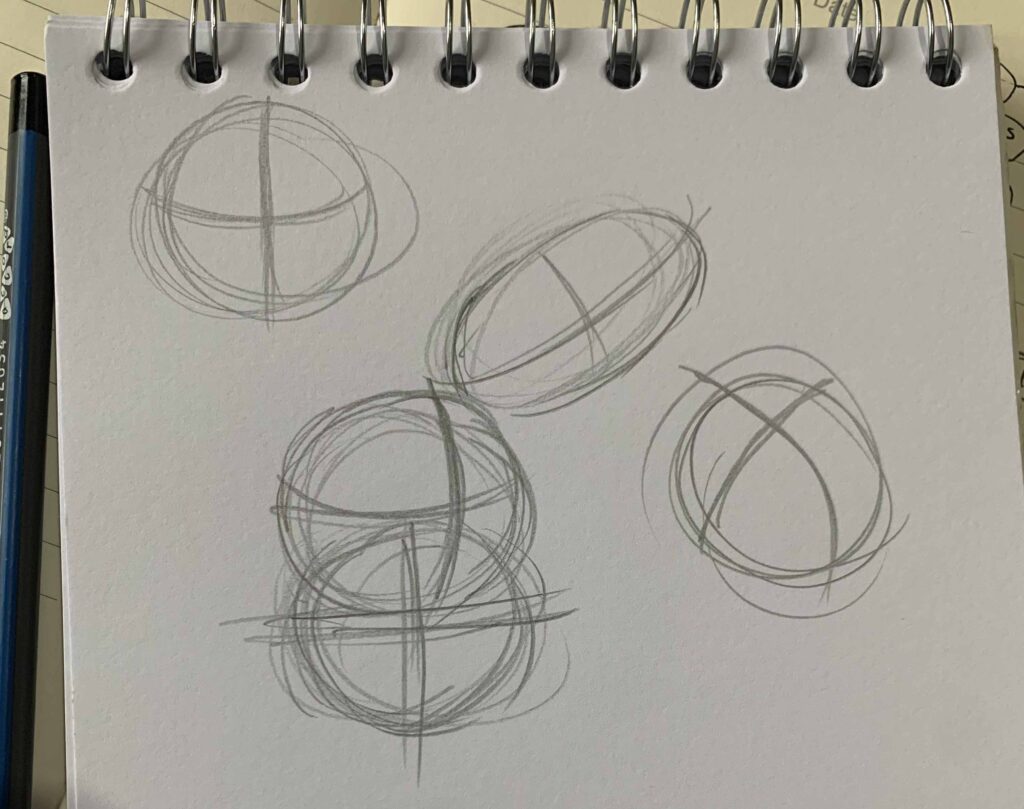
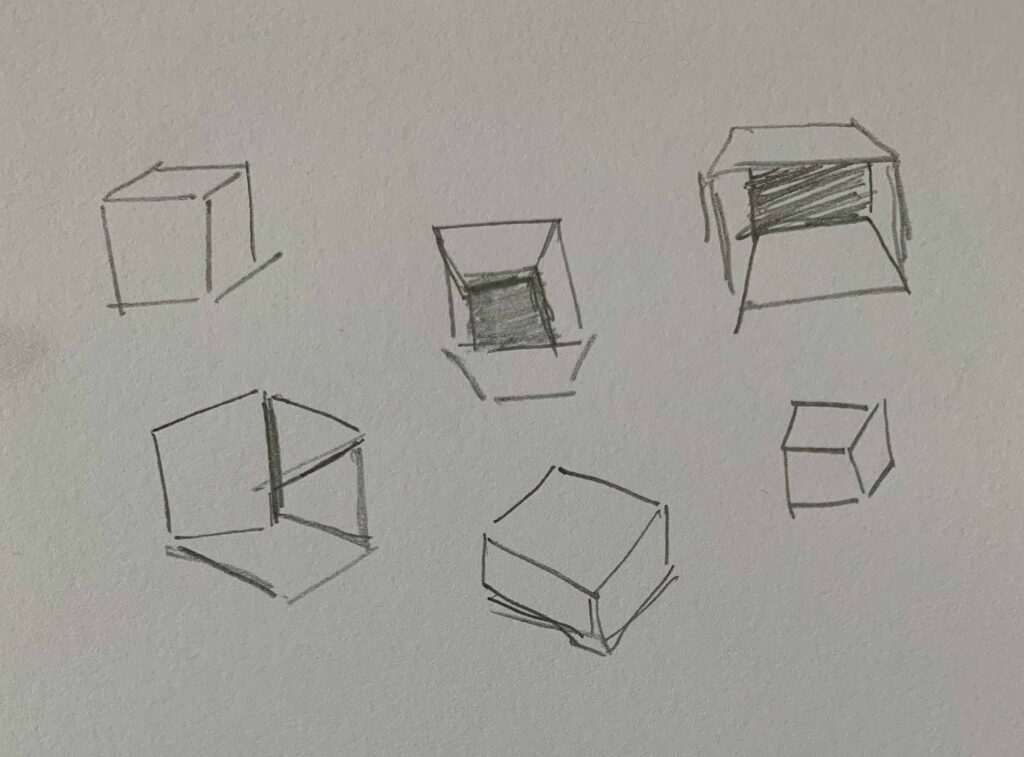
I personally like to practice oval and circular shapes, as well as 3D boxes, because I feel like these shapes are more common in everyday items.
3. Pick your desired object to draw and start tracing the basic shapes of it
Whatever you are willing to draw, print a picture of it, or place a piece of paper on top of your screen and try finding the basic shapes in your object.
Here, you can download some sheets to do this exercise on.
4. Draw negative space instead of positive space
When we perceive a picture or an image for the first time, our minds instantly start identifying familiar objects. Example: Looking at the following picture, what we see first is a cat in the outfit of the iconic painting “Girl with a Pearl Earring” by Johannes Vermeer.
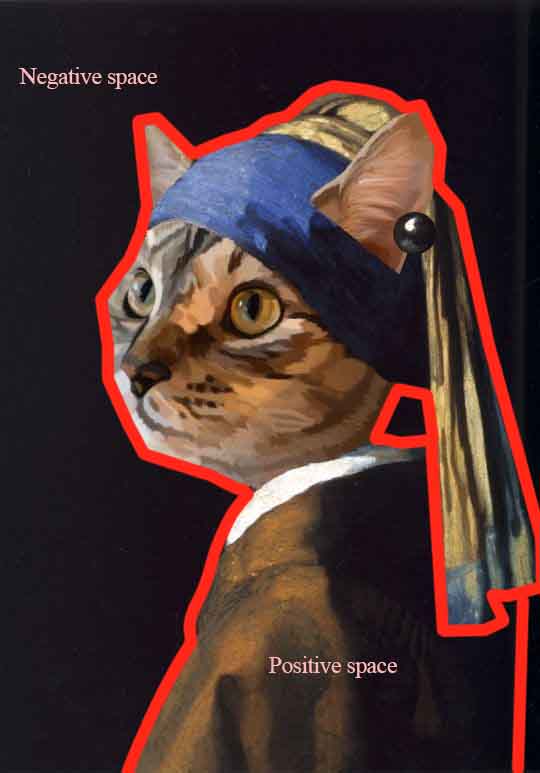
With this thought in mind, instead of drawing what we actually see, we start drawing what we think we see. However, when following the negative space approach, we draw the abstract shapes around the positive space, leaving us with a very accurate contour that will help us build a correctly proportioned drawing.
Watch this video to understand it better.
In my article, 5 Art Exercises to Boost Your Creativity (even if You’re Non-artistic), I shared great exercises that would help you improve your skills and boost your creativity.
5. Measurements and proportions matter more than details
The biggest mistake that beginners make is to get caught up in details when the proportions of their subjects are absolutely off. As a starter, you can trace your reference photo for the most accuracy and work your way up from there. I have previously shared the easiest method to do that in this article about art hacks that actually work, so make sure to check it out.
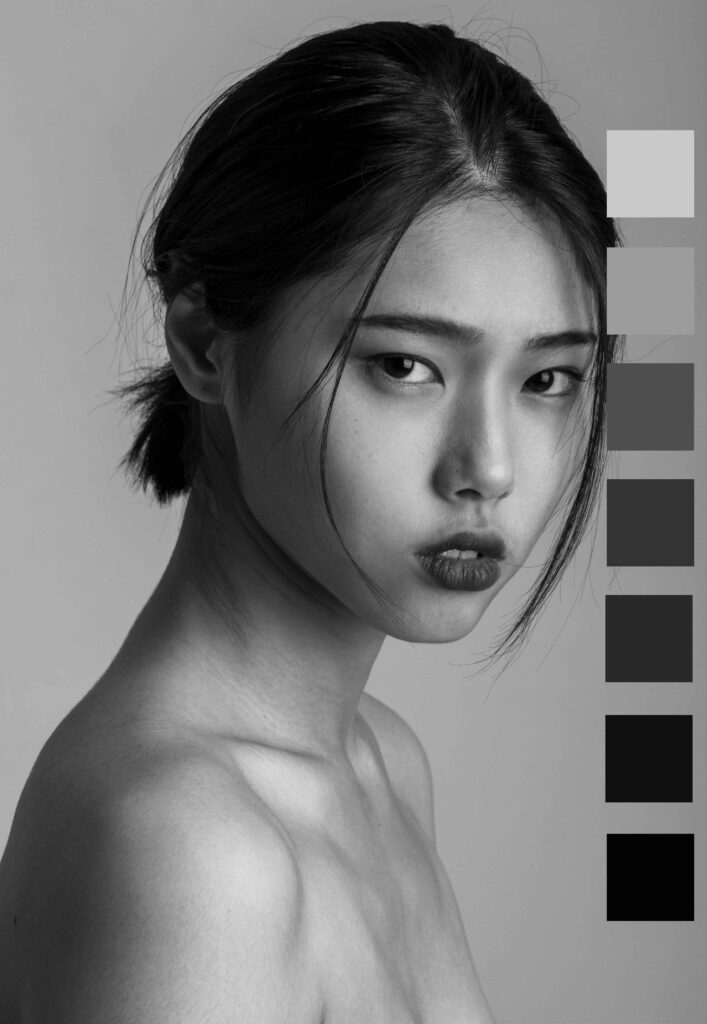
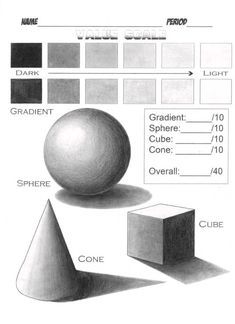
6. Value is the trickiest part about drawing and painting
A value is how dark or light an object is. When looking at a picture, we can usually guess the light source only from the shadows on the different objects. The closer an object is to the light source, the lighter the value will be, and vice versa.
When looking at a black-and-white image, especially for an untrained viewer, it’s easier to think that the highlights are white, the mid-tones are gray, and the shadows are black. However, the values I picked from the picture itself include no pure white, no pure black, and an important number of gray values.

You can practice shading different forms (3D shapes) under different light sources, which in the long run will help you recall how to shade your values for objects in everyday life.
7. Experimenting is your best friend
Experimenting with different materials, techniques, colors, etc. is such a shortcut to finding your area of mastery, what you enjoy the most, and what works best for you. Make sure you start with pencils and work your way up to colored pencils, pastels, acrylics, oil paint, and so on. The more you experiment, the more you figure out where your creative energy feels most at Home.
Conclusion
These are some of the tips I personally follow to create realistic drawings, either from photo references, from real life, or from my imagination. Leave me your concerns and questions in the comments section below for further insights on how to draw anything. Enjoy creating <3
I really needed this. I also have to go back to other articles. Thank you so much.
I am glad you found it helpful 😀 Enjoy creating <3
I’m pretty late in reading this but this seems focused towards realism. I do find this cool and all but I’m trying to learn the human anatomy so that I can draw my own character designs. Got any tips for this?