

In this post, I am going to share with you how you can create your first felt doll with me in a very detailed, step-by-step guide. Everything you need to know as a first-time felt doll maker with no previous sewing experience is going to be listed here to help you enjoy this crafting project and personalize your first doll to your liking.

Felt doll-making basics
The doll pattern
First, to make your felt doll, you will need a pattern. And while you can sketch your own doll pattern, it is much quicker to use one made by a professional doll maker for accurate proportions and measurements. And for that reason, I suggest you get the following book by artist and doll maker Shelly Down.
My Felt Doll: Easy sewing patterns for wonderfully whimsical dolls

The supplies you are going to need to make your first felt doll
- Felt sheets in skin color (other colors needed for clothes/accessories)
- Embroidery thread (in various colors)
- Embroidery needles (in various sizes)
- Scissors
- Stuffing
- A lot of patience
- Optional: fabric glue, beads, buttons, etc.
A step-by-step guide to making your first felt doll
Step 1: Cut the pattern
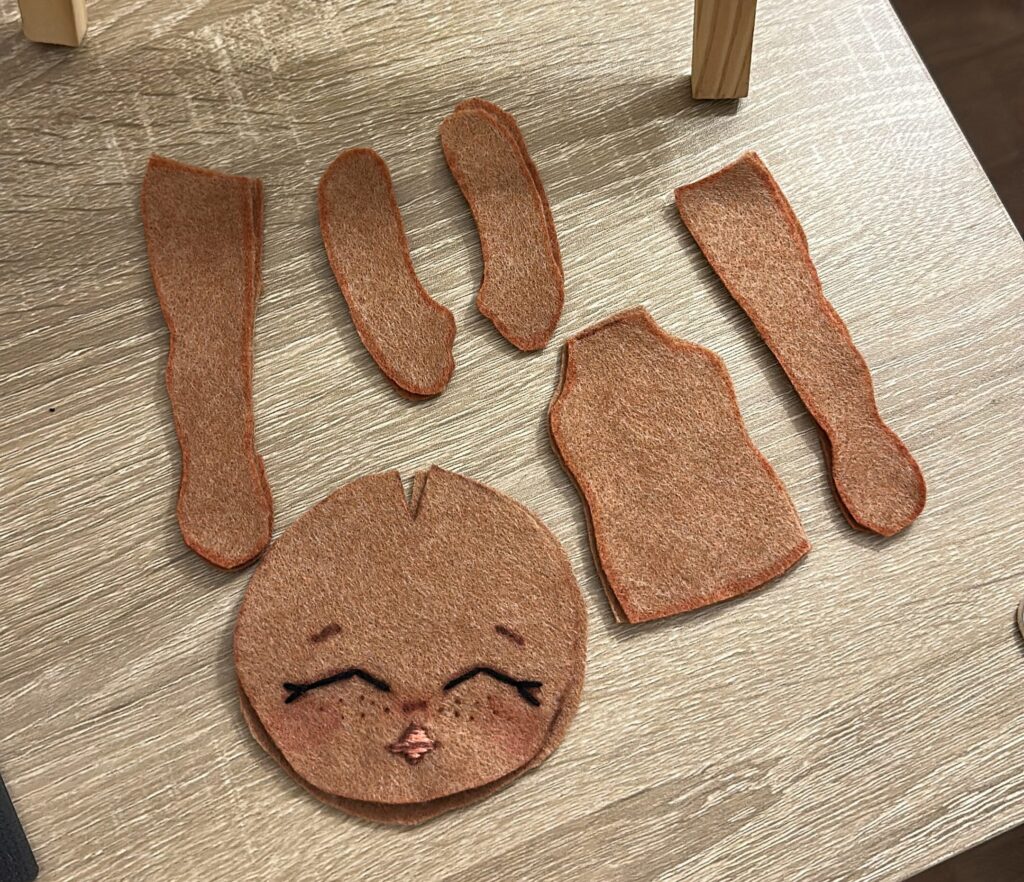
If you are using the book, copy and print the pattern page, then cut the pattern to trace it on your felt sheet. Then cut the felt to the shapes you traced. I skipped taking pictures of the paper step because I was in a flow state 🙂
You will have something that looks like this (Figure 1). If your felt pieces look uneven or seem crooked to you, don’t worry, I will get better when you start sewing (hopefully)!
Step 2: Trace the face
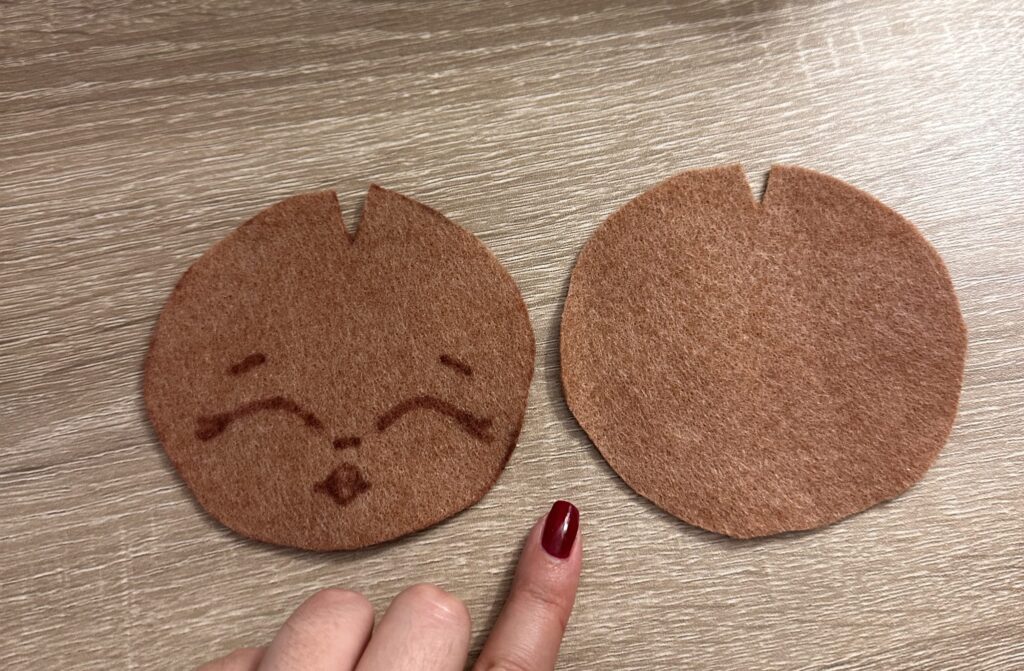
I used a water-based marker to trace the face so I can follow the lines when I embroider the facial features. You can follow the pattern or do this step freehand. Just make sure the features stay in the lower third of the head.
Step 3: Embroidering the face
This is a rewarding part of the process. This step gives your doll character, and you start to see it coming together.
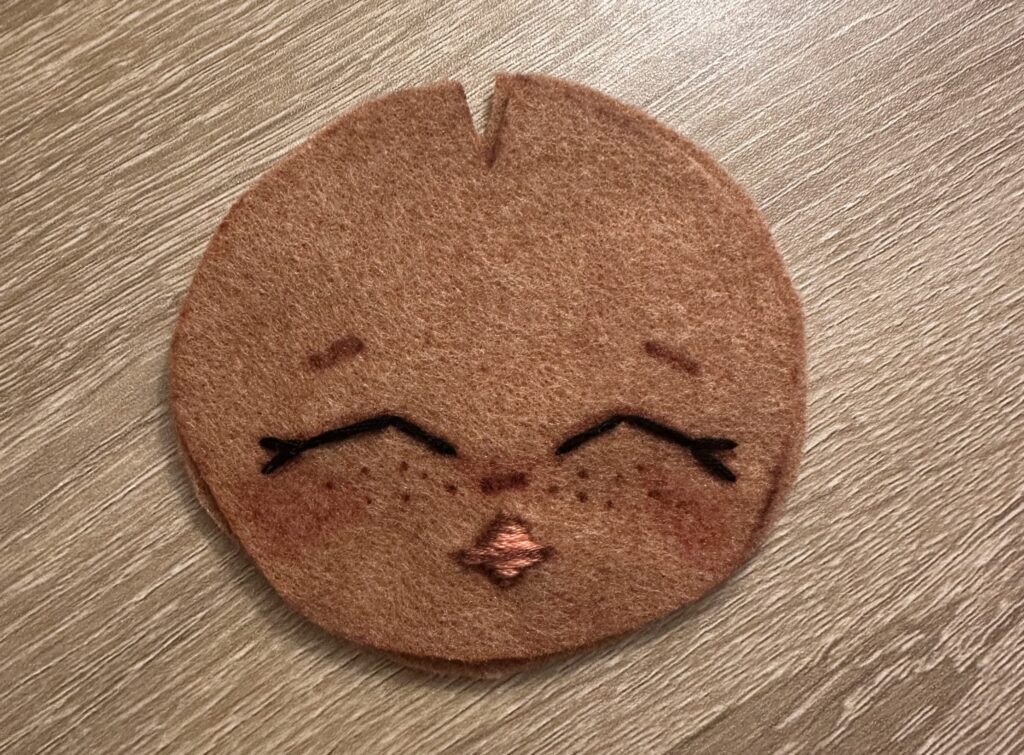
My embroidery thread was a bit thick, so I used it only for the eyes and mouth because I wanted the other features to be softer. I blended a peachy alcohol marker to the felt to give the doll blushed cheeks. Then I used a brown marker to define the lips, nose, brows, and give my doll some freckles.
Step 4: Start sewing your doll’s head
Running stitches, blanket stitches (my faves), and many more random sewing and stitching techniques to start assembling your doll pieces (fronts and backs) together, always leaving space to stuff the different parts.
Make sure you use your patience to keep the stitches at around the same spacing from each other, and do your best not to rush through it because the sewing really makes or breaks your doll’s finished look.

Step 5: Stuffing the doll’s head
I bought this stuffing bag at Cultura. And I used a chopstick to push the stuffing down to all the edges.

Step 6: Close the head completely
Finish sewing the head together to achieve a rounded shape like this one (figure 2). If you have some remaining thread attached, don’t cut it. We will use it to sew the head to the body later on.


Step 7: Repeat steps 4, 5, and 6 for the remaining body parts
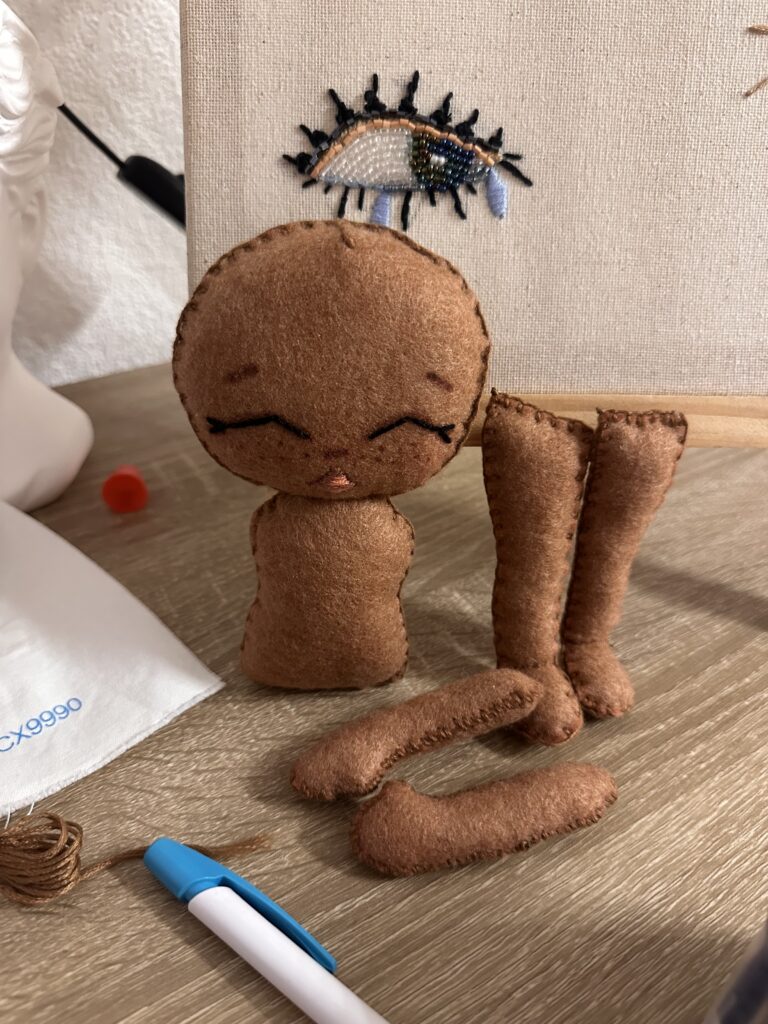
Sew together the front and back pieces of the body, right arm, left arm, right leg, and left leg. Then stuff them and finish closing the edges. You should end up with something that looks like this (Figure 3).
Step 8: Sew your pieces together
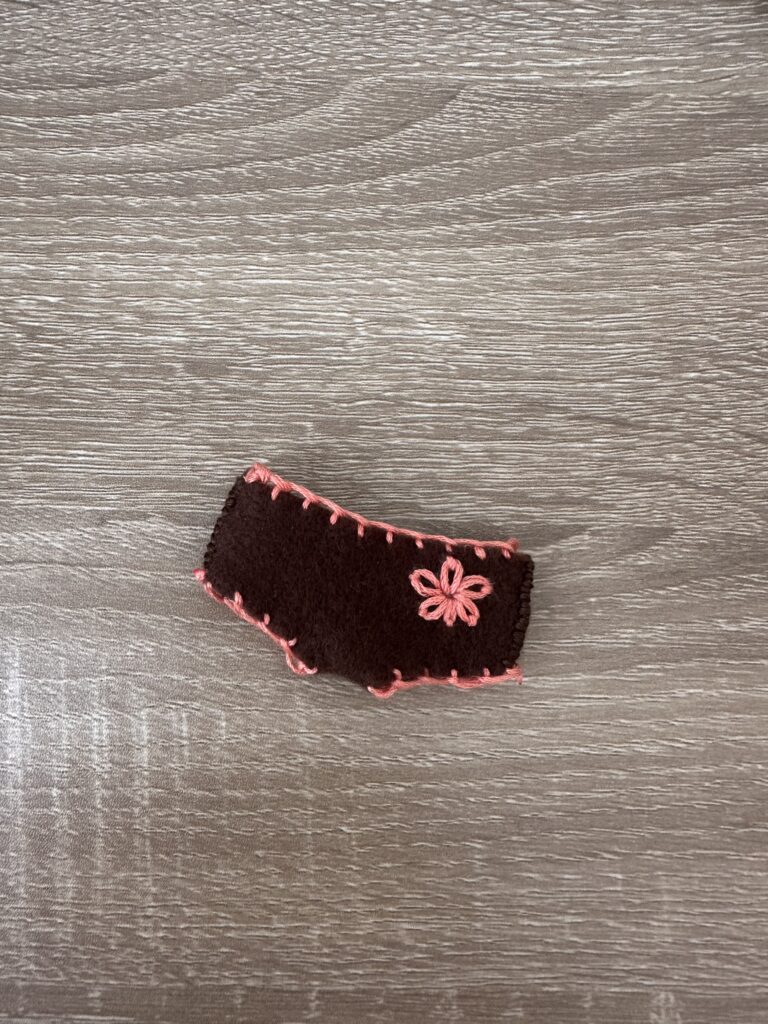
You will need a long needle to attach the arms to the body, the head to the body, and the legs to the body. Here, I made little felt boy shorts for my doll (which you will find the pattern for in the same book as well).

Step 9: Attach the hair to your felt doll
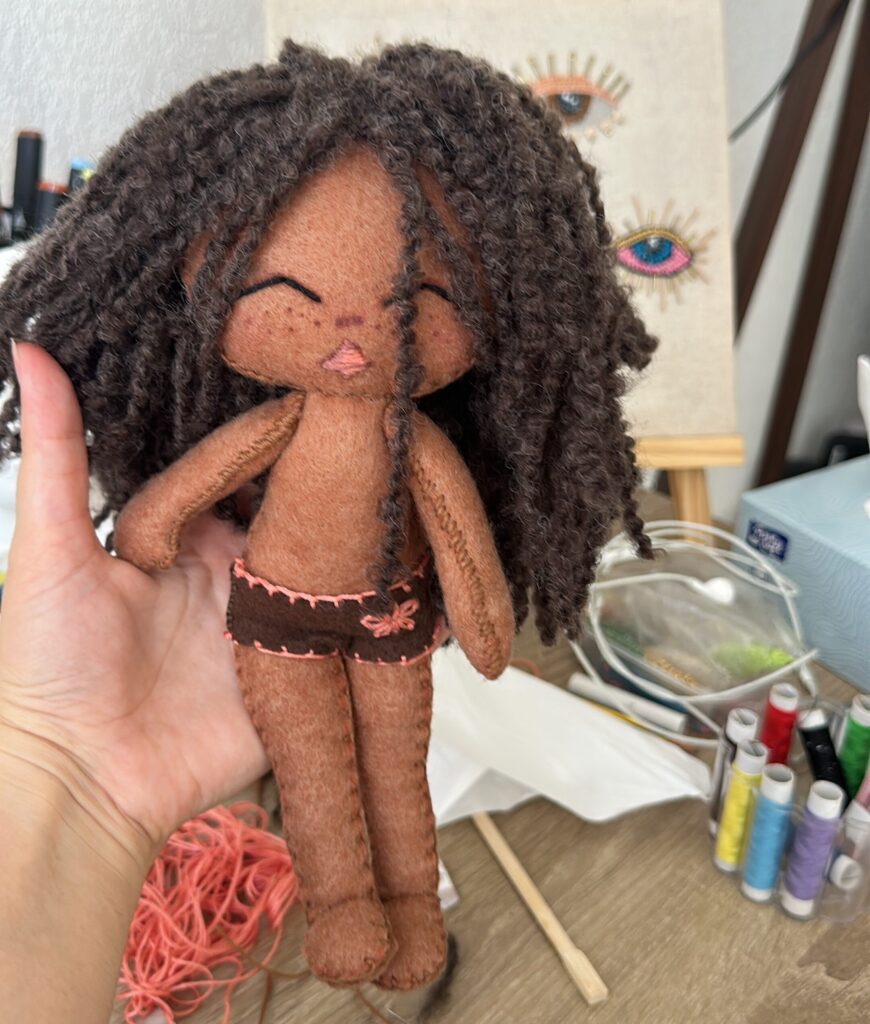
I got very lucky with the hair for my felt doll, as I came across this beautiful textured yarn at a local thrift store when I was shopping with my husband. And I knew it would make the most perfect curly hair for my doll. So make sure to check out your thrift/craft store for some unique yarn options to give your dolls an authentic look.
Conclusion
I followed the pattern and steps explained in My Felt Doll: Easy sewing patterns for wonderfully whimsical dolls to a T. And of course added my own take on the doll to make it mine. So don’t be afraid to get creative and stick to using the resources you already have. Your doll is going to look so cute no matter how messy the process is or how unsure you are about your capability of making one.
