Underpainting creates a huge difference in the outcome of your artwork, yet it might be intriguing and overwhelming for beginners. In this article, I am going to share with you all you need to know about underpainting as a beginner.
Disclosure: This blog post may contain affiliate links, which means I may receive a commission if you purchase the products I recommend. While purchasing the products I recommend won’t cost you any extra money, they will help me keep this blog up and running. Thank you for your support!
What is underpainting?
As the name suggests, underpainting is applying a layer of paint to your canvas or surface before painting it. Think of underpainting as a foundation for your artwork.
Underpainting is a base layer for the image you intend to paint and an outline for your future layers and color placement. Many artists use it so they don’t have to work or stare at a blank white canvas. But its main purpose is to build contrast and tonal values into the canvas, creating dark and light portions that will make those areas lighter or darker once you apply paint on top.
What are the two main types and methods of underpainting?
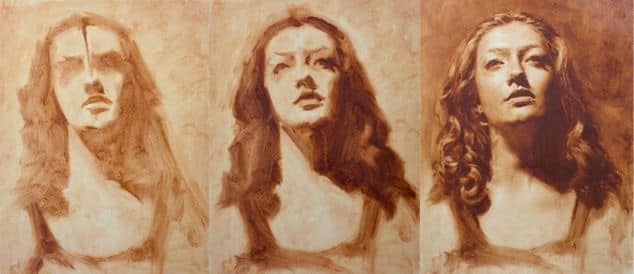
The Grisaille Method
“Grisaille” originated from the French word for “gray.” It is a traditional painting technique that involves creating a monochromatic painting in shades of gray or another neutral color, typically using oil or acrylic paint, before applying layers of color.
Here’s how it is applied:
- Sketching the artwork: You can begin by sketching the composition onto the canvas using charcoal or a light-colored pencil.
- Blocking in values: Using a single color (usually a neutral gray), it’s time to block in the major shapes and values of the composition. This initial layer establishes the light and dark areas of the painting.
- Building form and volume: With the underpainting in place, you focus on building form and volume by adding lighter and darker shades of the same neutral color. This helps create a sense of depth and three-dimensionality.
- Refining the details: Once the underpainting is complete, you may refine the details and make adjustments as needed before proceeding to add color layers.
- Adding the colors as glaze: After the underpainting has dried completely, you can apply transparent or semi-transparent layers of color (glazes) on top of the grayscale underpainting. These color layers add depth, richness, and complexity to the painting while allowing some of the underpainting to show through, creating a harmonious and unified effect.
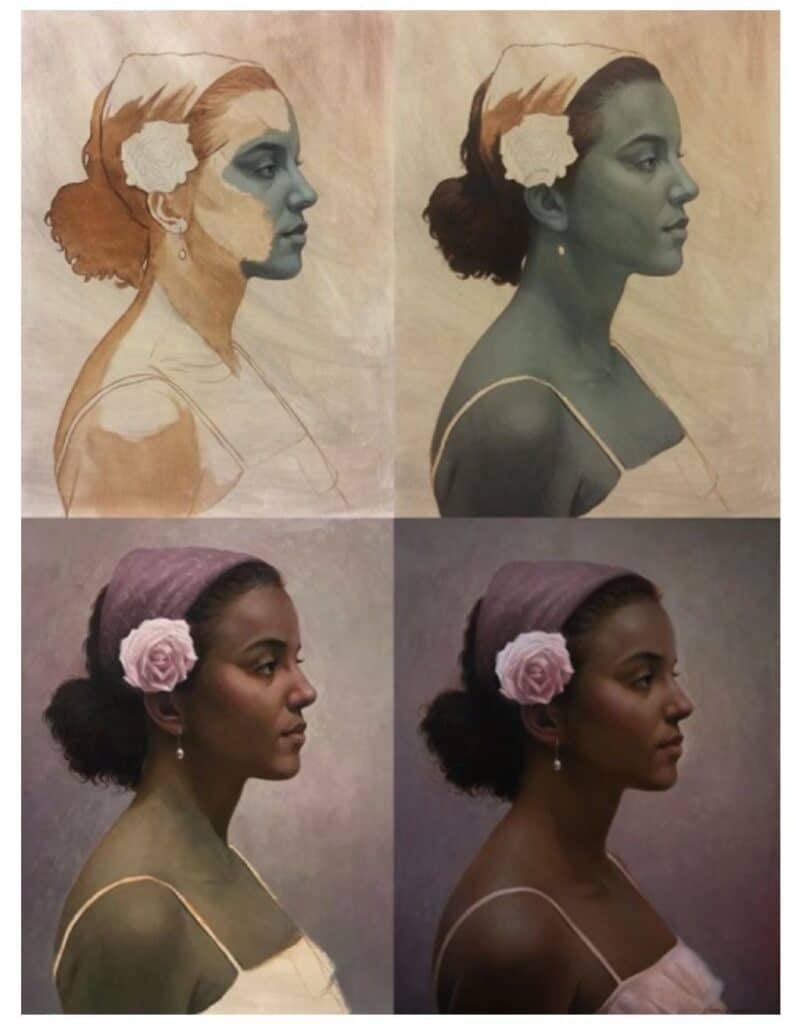
The Imprimatura Method
“Imprimatura,” on the other hand, is derived from the Italian word meaning “first paint layer” or “toning.” This underpainting method is typically used in oil painting, and it involves applying a thin, colored wash over the canvas before beginning the actual painting process.
To a prepped and primed canvas or panel, and instead of starting with a grayscale underpainting, as in the Grisaille method, you apply a thin, translucent layer of color over the entire canvas. This color is usually a warm, mid-tone hue, such as burnt sienna, raw umber, or transparent oxide red. The imprimatura sets the overall tone and mood of the painting. Once the imprimatura has dried, you can sketch or outline the composition onto your canvas using charcoal, pencil, or another drawing medium. This drawing will serve as a guide for the subsequent layers of paint. Then you follow the same steps as the grisaille method.
How to create an underpainting as a beginner?
You can dilute your paint with a thinning medium. If you are using acrylics, you can thin your paint with water until you reach a watercolor-like consistency for your underpainting. But if you are using oil paint, you can use an odorless mineral spirit like gumsol. On the other hand, if you are using a dry medium like oil pastels, you can start with a wash of color using very light pressure for your underpainting.
Why not skip underpainting your artwork?
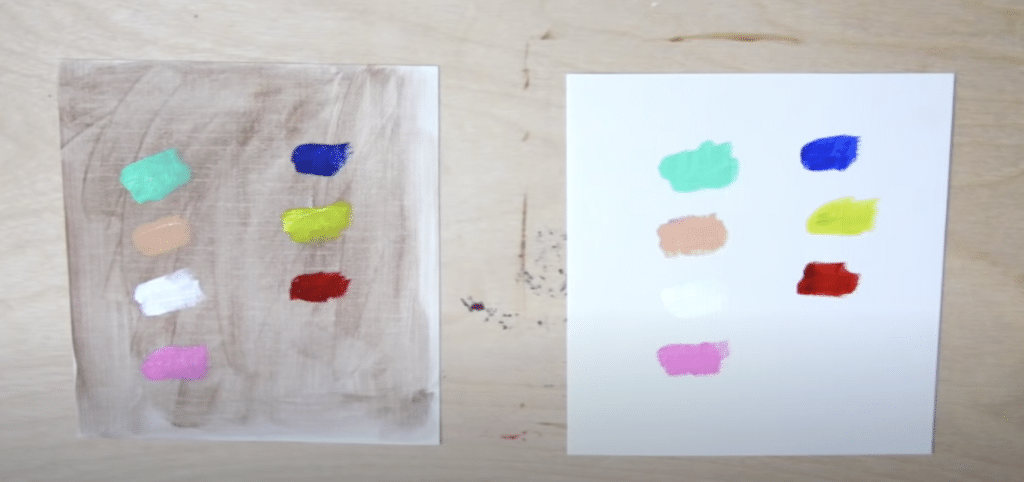
Most artists, myself included, never like to paint straight on top of white surfaces. Staining your canvas with a neutral color allows you to paint both highlights and shadows, but working on a white canvas will have you only focusing on shadows.
Look at this side-by-side comparison of color payoff on toned vs. white canvas.
Examples of underpaintings by old masters
During my visit to Le Gallerie Degli Uffizi in Florence, Italy, the unfinished “Adoration of the Magi” by Leonardo Davinci stood there to show the artists that followed Davinci’s underpainting technique.
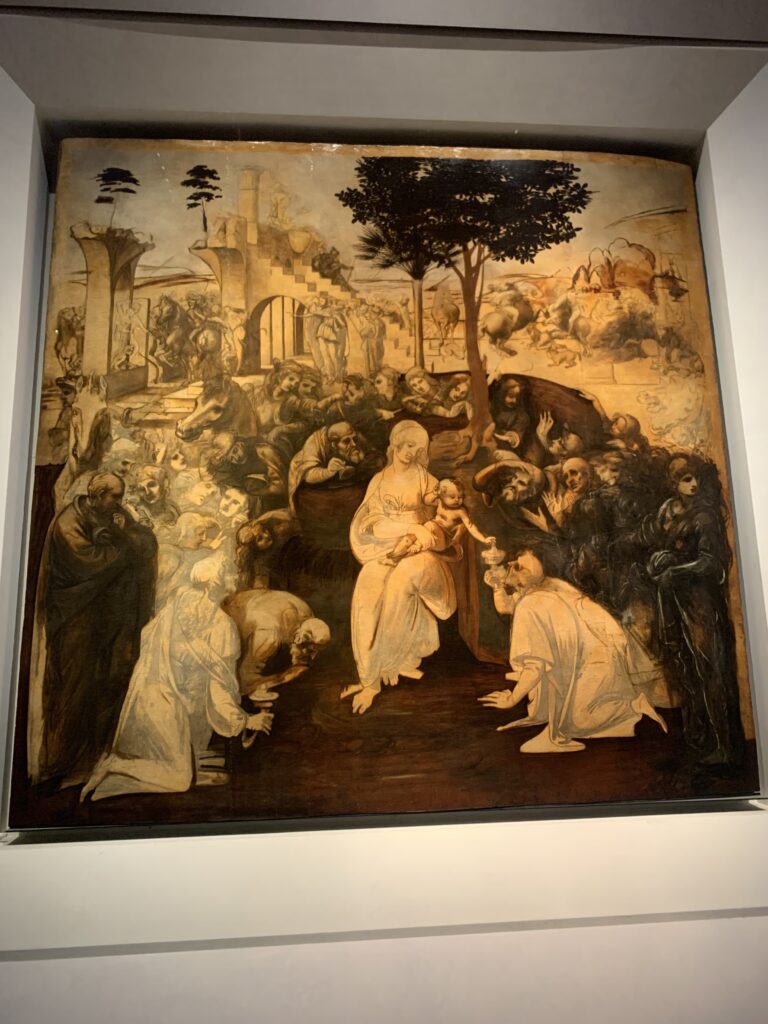
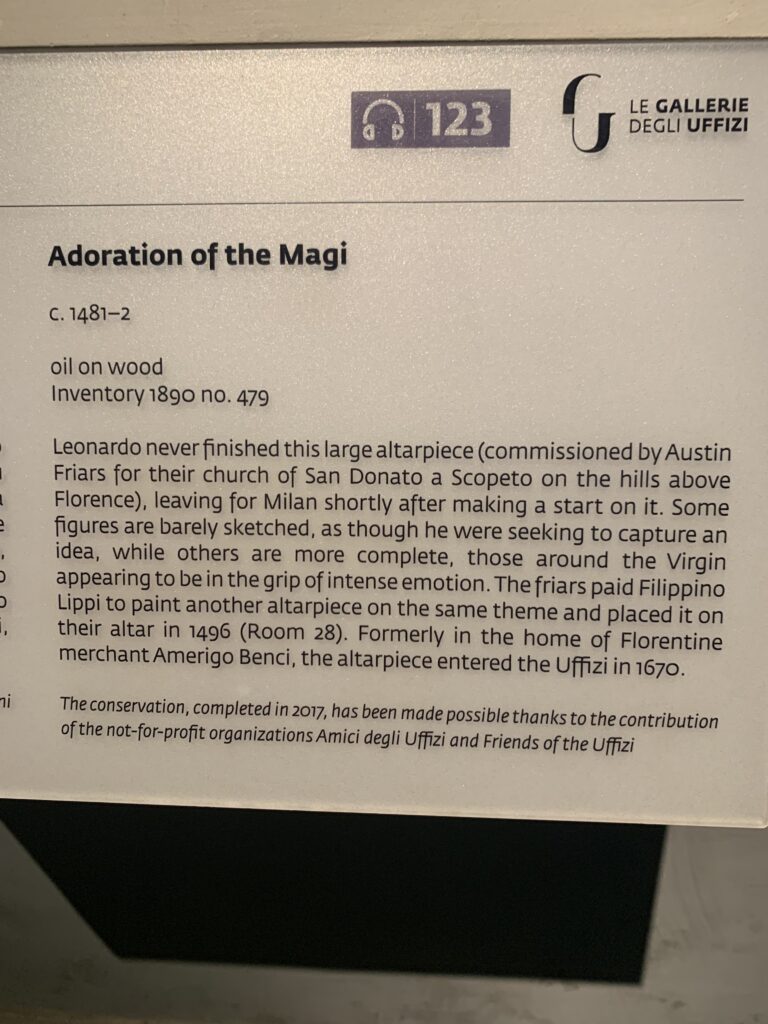
When we look at this unfinished painting, we can see that Davinci created a vision of the totality of his pictorial idea using a minimum of effort and expense. Underpaintings in the past, were often created with cheap earth pigments like raw umber, so the purpose of the underpainting was to provide a structural foundation for the artwork, helping to map out the composition and guide the placement of objects and figures. Equally important, it helps establish the tonal values of a painting, serving as a guide for the placement of light and shadow, both of which are crucial for creating depth and volume in the composition.
Do you create underpaintings for your artwork? Let me know in the comments and subscribe to my blog for more art content.
Enjoy creating <3